

Low-carb bread egg cups are a practical muffin-tin breakfast: press one bread slice into each well, add a small amount of cheese and vegetables, then fill with beaten egg and bake until the center is safely cooked. You get a bread-lined cup with crisp corners and a soft egg filling. The most useful tricks are keeping the fillings dry, leaving room for the egg to expand, and checking the center with a food thermometer.
This is a suggested home-kitchen method, not a report of a tested batch. Bread thickness, muffin-pan size, and oven performance can change the cooking time. Use the temperatures and visual checks below rather than treating the timer as a guarantee.
Low-carb bread egg cups at a glance
- Yield: 6 cups, or 3 servings of 2 cups.
- Preparation: about 15 minutes.
- Baking: approximately 18–24 minutes at 350°F (177°C), with extra time if needed.
- Equipment: a standard muffin pan, bowl, whisk, and food thermometer.
- Best served: shortly after baking, while the bread edges are crisp.
Use six wells of a standard 12-cup muffin pan. Do not use a mini pan for these quantities. A large bakery-style pan also changes the fit and timing, so begin with a standard pan for the simplest result.
Ingredients
- 6 slices low-carb sandwich bread
- 4 large eggs
- 2 tablespoons milk or water
- 1/3 cup shredded cheddar or Monterey Jack
- 1/4 cup cooked, finely chopped vegetables, drained and squeezed dry
- 2 teaspoons olive oil or softened butter for the pan and exposed bread corners
- 1/8 teaspoon salt, optional
- Black pepper to taste
The salt is optional because the bread and cheese already contribute sodium. For vegetables, use cooked spinach, finely chopped sautéed bell pepper, or cooked mushrooms. Measure the vegetables after cooking and draining. Raw mushrooms and large handfuls of raw spinach release water into the egg and can leave the bread soggy.
Choose bread that bends without breaking
A soft, reasonably thin sandwich slice is easier to shape than a dense, fragile loaf. The slice should cover the bottom and part of the sides of a muffin well without needing force. If your bread is unusually thick, flatten it lightly with a rolling pin. Press gently; crushing it into a paper-thin sheet can make the bottom tear.
Keep the crust when it is flexible. Trim a stiff crust only if it prevents the slice from fitting, and save the trimmings for oven-baked bread chips. There is no need to cut a perfect circle. The corners sticking above the filling become the crisp edges.
Check your package’s actual serving size. One slice per cup is the recipe’s bread portion, but the label may describe one or two slices as a serving. Our guide to reading a nutrition label for net carbs explains how to keep those quantities consistent.
How to make the cups
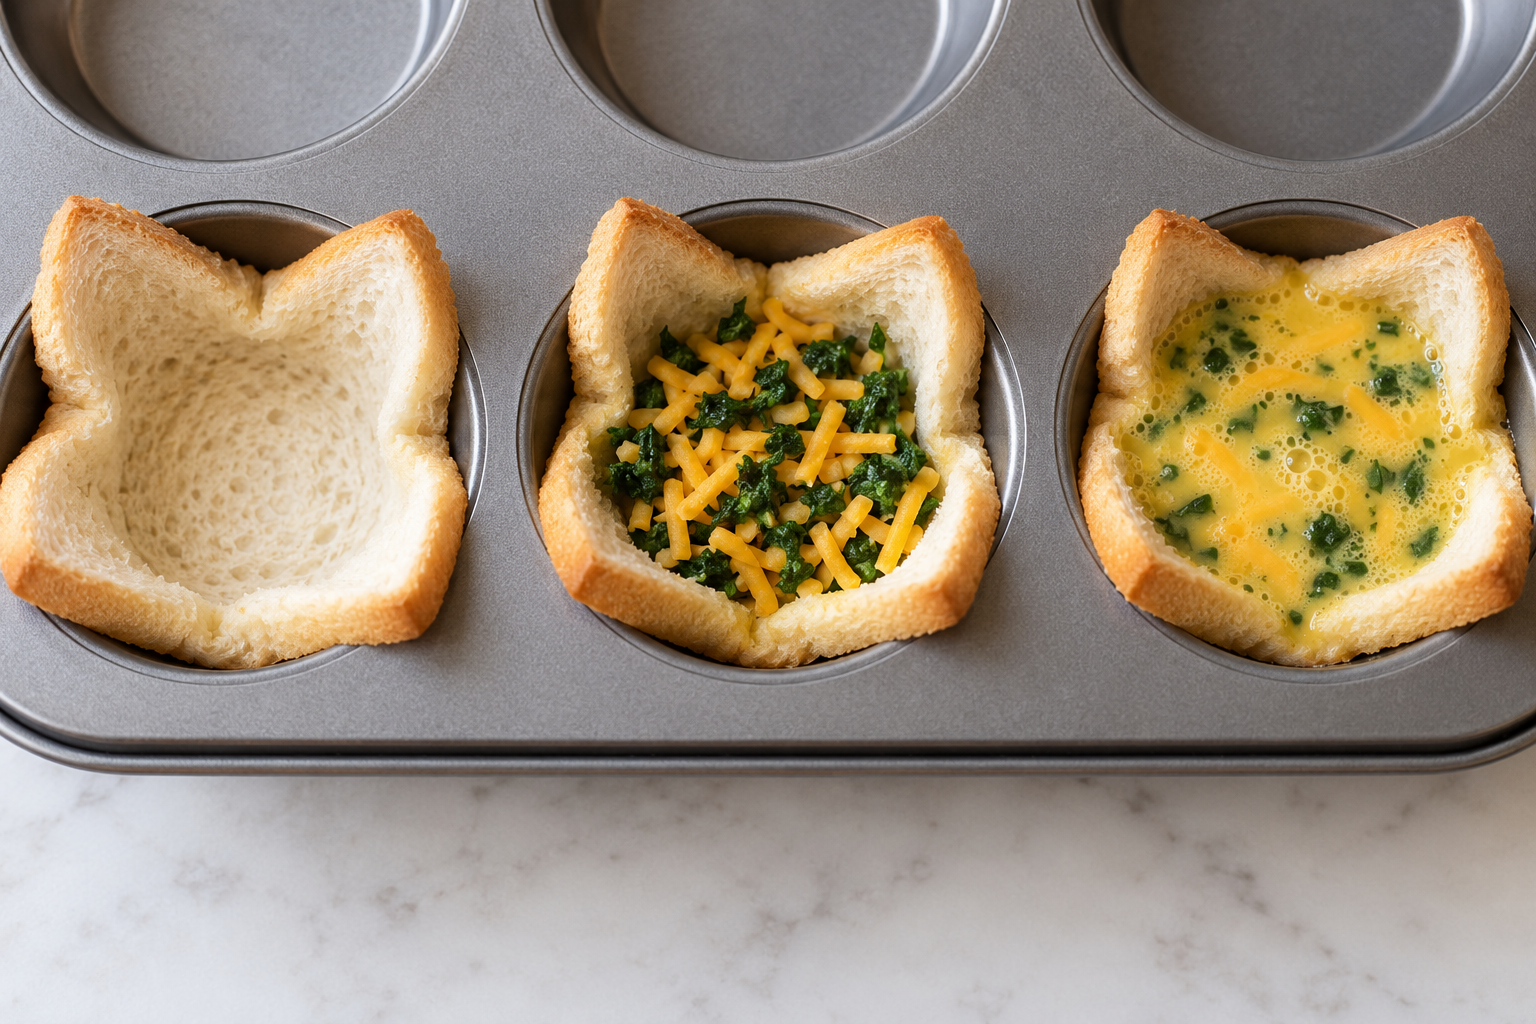
- Heat the oven. Set it to 350°F (177°C), with a rack near the center. Grease six muffin wells lightly, including the upper sides.
- Shape the bread. Flatten each slice gently if needed. Ease it into a well, pressing the center down first and folding the sides enough to fit. Patch a small tear with a piece of bread; do not leave an open gap at the base.
- Add dry fillings. Divide the cheese and cooked vegetables among the cups. Brush the exposed bread corners lightly with the remaining oil or butter.
- Mix the eggs. Whisk the eggs with the milk or water, optional salt, and pepper until the whites and yolks are evenly combined.
- Fill carefully. Pour the egg mixture into each bread cup, leaving roughly 1/4 inch of space below the top of the lined well. Pan sizes differ. If there is leftover mixture, cook it separately rather than overflowing the cups.
- Bake and check. Begin checking at 18 minutes. Continue until the egg is set and the center of the filling reaches at least 160°F (71°C). Measure the egg, not an exposed bread corner.
- Rest briefly. Let the cups stand for about 3 minutes. Loosen around each with a silicone spatula and lift out carefully. Serve warm.
If the bread corners darken before the egg is done, cover the pan loosely with foil and continue baking. Do not remove an undercooked cup simply because its bread looks ready. The USDA’s shell-egg guidance recommends a center temperature of 160°F for egg dishes and 165°F when reheating them.
Small changes that keep breakfast interesting
Spinach and cheddar
Use the base quantities with cooked spinach squeezed very dry. Chop it again after squeezing so a long strand does not pull the filling out when you bite. A small pinch of garlic powder works well without adding moisture.
Bell pepper and Monterey Jack
Cook finely diced pepper until softened, then let excess moisture drain before measuring. Spread it across the six cups instead of putting a large mound in one. Finely chopped chives can go into the egg mixture.
Plain cheese cups
Leave out the vegetables when you want the simplest version. Keep the cheese quantity moderate: more cheese adds richness but can crowd out the egg. Serve tomatoes or avocado on the side rather than packing every ingredient into the cup.
Troubleshooting the bread and egg
A wet bottom: check the vegetables first. Drain them thoroughly, avoid overflowing, and remove finished cups from the pan after the short rest so steam can escape. A bread slice with a very moist crumb may stay softer than an ordinary toast slice even when cooked correctly.
Egg leaking underneath: a torn bread base or a badly folded slice can let the mixture reach the metal. Greasing helps release, but it does not seal a hole. Patch tears before filling, and work slowly with a fragile loaf.
Rubbery eggs: check early and stop when the filling is safely cooked. A prolonged bake can dry the eggs. Very small amounts of filling cook faster; a crowded or oversized cup may take longer.
Cups sticking: grease the well sides, use a flexible spatula, and give the cups a brief rest. Paper liners change the bread’s contact with the pan and can reduce crispness, so a greased metal pan is the preferred starting point.
Make-ahead storage and reheating
Fresh cups have the best contrast between crisp bread and soft egg. For later meals, place cooked cups in a shallow container and refrigerate promptly. Do not wait for them to cool completely on the counter. Keep them refrigerated at 40°F (4°C) or below and use within 3–4 days.
Perishable food should be refrigerated within 2 hours, or within 1 hour above 90°F (32°C). Reheat the egg center to 165°F (74°C). An oven can help firm the bread again; a microwave is convenient but softens the edges. See the USDA food-safety basics for chilling and leftovers.
Carbohydrates and allergens
There is no universal carb number for this recipe. Add the carbohydrates from six bread slices, the cheese, milk, and vegetables using your own labels, then divide by six for one cup or three for a two-cup serving. Include toppings separately. Water in place of milk changes that calculation slightly.
This recipe contains eggs and, with dairy cheese or milk, milk. Wheat is common in low-carb bread, and some loaves contain soy, sesame, nuts, or other allergens. Check the full label of every ingredient. A keto claim does not mean gluten-free.
Save This Post on Pinterest
Save the recipe or the quick preparation tips for your next breakfast.


Start with the bread you already enjoy
Make one small batch with a familiar loaf before scaling up. Note whether its corners brown quickly and whether it bends cleanly into your pan. Adjust the shaping and checking time for that bread, while keeping the safe egg temperature the same. Serve two cups with a simple side for breakfast and save the remaining portions promptly.
Plan Your Week with Our Free Meal Planner
Choose seven days of meals, adjust portions, and download your shopping list. No email signup needed.
Open the Free Planner →
